Like all moms, I find myself wishing and praying that my kids will grow up to be good people: kind, loving, sharing... Sometimes I wonder whether or not I am the right person to prepare them to be the kind of human beings I want to raise. Then there are little glimmers of hope interspersed amongst the craziness that is day-to-day life with young children.
Tonight, as we were eating dinner (or rather the kids were complaining about the crescent mummy dogs I had prepared, which is another story altogether...), I noticed that Logan was handing pieces of mixed vegetables to Ritzy underneath the table. When I tried to stop him by saying, "Please don't feed the dog," he gave me a knowing grin and informed me, "I sharing!" Well played, Little Man, well played. Who am I to complain when my child is willingly sharing when I have asked him to do this very thing so many times before?
Monday, October 29, 2012
Sunday, October 28, 2012
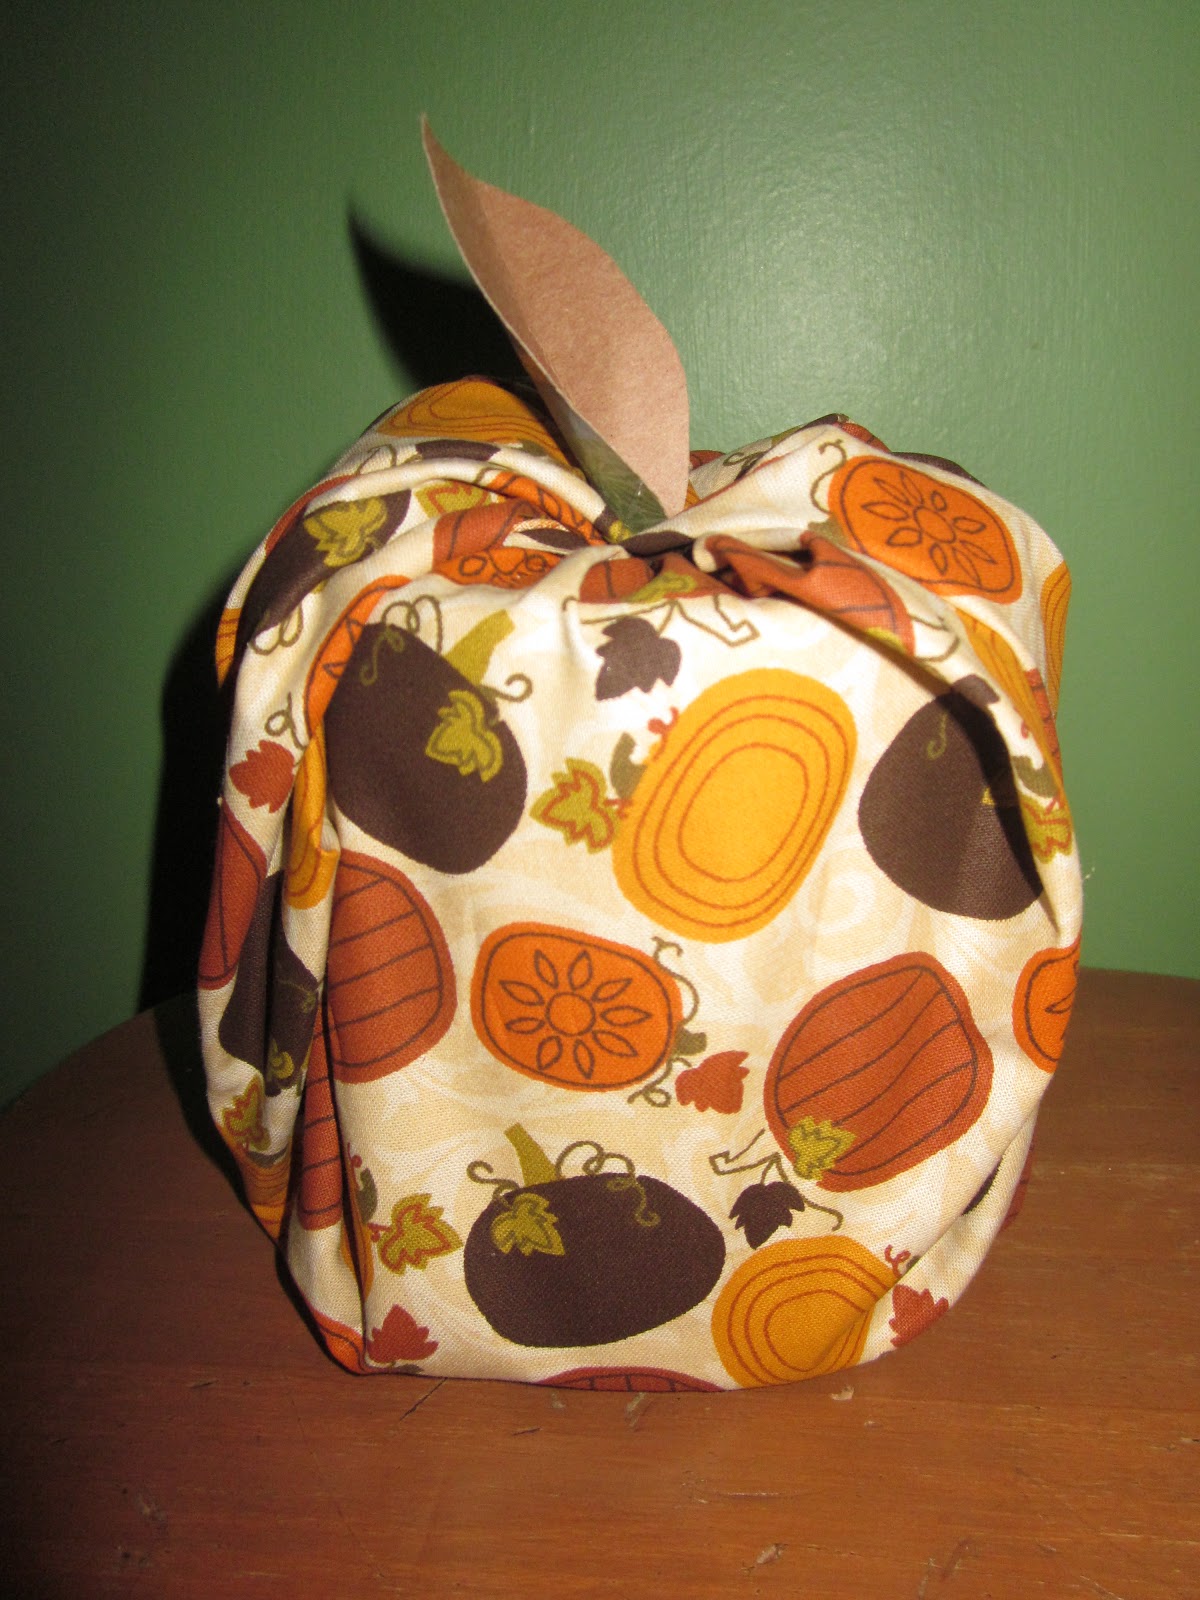
Paperback Pumpkins, Apples, and Pears
I learned how to make paperback pumpkins at our local library recently, and I was so excited by the first one that I quickly returned to buy a stack of books to make more pumpkins. Once I knew the basic steps, I was also able to make apples and pears so now I have a total of 7 fruit shapes on top of my kitchen cabinets. They are very festive for fall.
 |
| {The paperback pumpkin that started it all...} |
Materials:
 |
| {Paperback Apple} |
- paperback books
- scratch paper
- pencil
- scissors
- sponge (I used an old kitchen sponge cut in half.)
- acrylic paint (I used orange, yellow, red, and green.)
- tray/plate to hold paint
- cup of water
- sticks/twigs
- curling ribbon, twine, or other ribbon
- hot glue gun
- newspaper to protect work surface
Directions:
1.) Gather some old paperback books, the more beat up the better. |
| {These teen books were just ten cents each at our library.} |
2.) Decide which shape you want to make (apple, pear, pumpkin). Fold a piece of paper in half like a hamburger. (I re-used some printer paper for this.) Draw your shape on one half, cut it out, and unfold it. Make sure it looks the way you want, or make changes if desired. (Note: Definitely be sure that your template will fit the pages of your book.) Now is also a good time to warm up your glue gun.
 |
| {Some of the titles are pretty funny: Help! I'm Trapped in My Gym Teacher's Body.} |
3.) Tear off the front cover and then begin tracing the template onto the first page using a pencil. Cut out a small section (say 20 pages or so, depending on the sharpness of your scissors and how many pages you can comfortably cut). Continue tracing and cutting small sections until the entire book has been done. Tear off the back cover and any remaining parts of the cover on the spine. (Note: I would start cutting at the bottom, work my way up to the top, and once I got close enough, just tear off the remaining section to the point where it meets the spine, which saves some cutting.)
 | ||||
| {Tracing my first pear...} |
 |
| {Cutting out a pumpkin} |
4.) Now for painting. This step takes the longest. First, protect your work surface with newspaper. You may also want to wear old clothes since acrylic paint will stain. Pour some paint onto a tray or plate (I used old Styrofoam meat packaging at home and a paper plate when I made my first one at the library.) Dip you sponge into the cup of water, then dip it into the paint, and dab it onto your tray/plate so that you are applying thin coats only. Sponge paint both sides of each page. I did just outside edges, leaving white space in the centers of each pear, apple, or pumpkin shape. (Note: Thin coats of paint work best because it dries faster and the pages are less likely to stick together. On my first apple, I experimented with a sponge brush in place of a sponge. It worked, but the paint went on much, much wetter and took forever to dry -- over 24 hours and that was with the help of a hair dryer -- so I don't recommend this method because once you start, you want to finish.)
 | ||
| {Sponge painting the pear} |
 |
| {This apple I painted with a sponge brush, but it was not my preferred method.} |
5.) Use a generous amount of hot glue along the spine of the book and then fold the book backward pressing the spine together. The pages should now fan out. Fold parts or individual pages back and forth as needed to get the look you want. (Note: As I made more of these, I just started folding the book back and forth along the binding before even starting the paint process because looser bindings seem to be easier to work with. Sometimes you just have to keep playing with it until it looks the way you want. If it isn't perfect, that's okay, the final step really makes it look finished. Plus, if there are sections pages that lay open and don't look the way you want them to, you can just point this toward the back of your display, unless it is your table centerpiece.)
 |
| {A Finished Pear} |
6.) Put the finishing touches on your pumpkin, apple, or pear. Add a stick to the center (or wherever you can get it to fit) using hot glue. If needed, glue a page or two around it. Green curling ribbon looks nice for a pumpkin and really makes it look special and finished. I had some wide sparkly green ribbon that I thought would make nice "leaves" for my apples so I just tied that around the stem and cut each end on an angle to resemble stylized leaves (without trying to make them really look like leaves). For my pears, I tied bows with cute green and brown pear ribbon that I happened to have. I thought they turned out cute. For one pumpkin, I used twine instead of curling ribbon to give it a more authentic look. I am not sure if I love it, but it is one option and something different. (Note: My
first pumpkin would not stand up straight so I tried trimming the
bottom of the pages to make them flatter. When that did not do the
trick, I added some cardboard to the bottom, which stabilized it.)
 | |||
| {My First Finished Apple} |
 |
| {Finished Pumpkin with Wider Curling Ribbon} |
 |
| {Finished Pumpkin with Twine} |
 |
| {My Finished Fall Display!} |
Sunday, October 21, 2012
A Super Simple Pumpkin Craft!
 |
| {The "Finished" Results} |
 |
| {Before adding the stick and twine... It's just missing a little "something."} |
Thursday, October 18, 2012
Halloween Craft Reboot
If you have been reading for awhile, you may remember our milk jug ghosts from a couple of years back, when it ended up being a project for me, and not really for kids. Well, I decided to try again this year now that Mia is a bit older and the thought of handing her a permanent marker wasn't quite so scary.
This project was an ideal way for me to practice letting go, because my five-year-old's ghost jugs don't look the way I would have made them. I would have made sure the eyes and mouths were larger, and I definitely would not have thought to include teeth the way she did. I sat back and let her do her thing and I even tried really, really hard not to cringe when she dropped that Sharpie. (Note: I do recommend old clothes if you are feeling brave enough to let your kids try this.) The results are great, even if they aren't what I would have created.
Mia was very proud of being able to do it herself. (My contributions were to wash the jugs, cut out the openings in the backs, and put the string of Christmas lights into the openings.) One little change we made this year was to use half-gallon jugs as well as gallon jugs (from milk and cider), mostly because this is what was available and not already crushed and placed in the recycling bin. I think having the different sizes of ghosts makes for a nice display.
 |
| {Ghost Jugs by Mia, Age 5} |
 |
| {A Proud and Happy Girl!} |
No Tricks, Just a Healthier Halloween Treat
Finding a healthy Halloween treat for Mia's class party turned out to be a tricky proposition. I thought if I just turned to the trusty Internet, I would find TONS of great ideas. Not so, but I did eventually come across this idea for mandarin orange cups made to look like jack-o'-lanterns, which I decided I needed to borrow. It really was the only remotely healthy snack idea I could find. Normally, we don't buy a lot of canned fruits because it is tricky to find them in juice or water instead of syrup, but I decided this was still better than cookies, candies, cupcakes, and so on. I am sure the kids are going to get plenty of those treats on Halloween. Before shopping, I saved all the coupons I could find and then ended up purchasing the Kroger store brand with my catalina coupon since it was the best deal. The best part about this craft is that it's very simple because all you need are mandarin orange cups and a black Sharpie marker. If you can draw a basic jack-o'-lantern face, you can do this project. If you are feeling creative, you can even make different faces for all the mandarin orange cups. If I weren't worried about costs, or if I knew we would have very few trick-or-treaters, I would even consider making these to pass out for Halloween treats. For now, though, I hope Mia's kindergarten friends enjoy their healthier classroom treat.
 |
| {I am excited for my healthy and cute classroom treat!} |
Friday, October 5, 2012
Feeling a Bit Saucy?
Why did I not realize sooner that I could make applesauce in my slow cooker? Mia came home from school so excited last week because her teacher took the apple she had brought in, along with all the others, and made applesauce right in the classroom using her Crock Pot. When she had told me she needed an apple for this activity, I wondered how in the world Mrs. Myers was going to do that without using a stove top and now I know. Since last Friday when I learned about this, I have made applesauce in the Crock Pot twice, with mixed results.
The first time, I used this recipe and modified it somewhat. Instead of 10 apples, I used 4 large Gala and 3 medium Granny Smith apples. This filled the slow cooker about 2/3 of the way. I also used less than 1/3 cup of sugar instead of the 1/2 - 1 cup that the recipe calls for. (That really sounds like a LOT to me.) The only problem was that I left the peels on (I seemed to remember doing this before, but maybe I am confused?) and they fell off and left the applesauce with a weird texture, so that Mia and I were the only ones who would really eat it. I wonder if putting it in the food processor would have solved that issue, but I never bothered to try. The taste was great, but that doesn't matter if people won't eat it.
Not to be discouraged, I tried again today. I was positive that slow cooker applesauce was a brilliant idea and I just had to fine-tune the details. My second batch was based off of this recipe. I used Gala apples along with Granny Smith again (and possibly a Honeycrisp may have been thrown in; I can't remember for sure). I changed the recipe slightly by using only 1/8 cup sugar in place of 1/2 cup and I skipped the cinnamon altogether since Logan seemed averse to it. This batch cooked on high for 3 hours before I mashed it (very, very easily) with my potato masher. I wish I knew how he felt about the changes, but he went to bed early without even tasting it. It definitely isn't too sweet, and Mia asked for seconds and thirds, so I know she enjoyed it. The kitchen smelled nice (although it would have been just heavenly if I had added the cinnamon), and overall, this was a success. I will most definitely be making more slow cooker applesauce, but I think next time around, I will use apple cider in place of water like I have done in the past when I make my applesauce on the stove top. Yummy! I love fall in the Mitten State (even though my apples are coming from elsewhere this year).
The first time, I used this recipe and modified it somewhat. Instead of 10 apples, I used 4 large Gala and 3 medium Granny Smith apples. This filled the slow cooker about 2/3 of the way. I also used less than 1/3 cup of sugar instead of the 1/2 - 1 cup that the recipe calls for. (That really sounds like a LOT to me.) The only problem was that I left the peels on (I seemed to remember doing this before, but maybe I am confused?) and they fell off and left the applesauce with a weird texture, so that Mia and I were the only ones who would really eat it. I wonder if putting it in the food processor would have solved that issue, but I never bothered to try. The taste was great, but that doesn't matter if people won't eat it.
 | ||
| {This first batch looked so very pretty before it cooked, and I was feeling optimistic that it would be a success. I guess looks can be deceiving, eh? I didn't take an "after" photo because of the apple peel texture making it look not so appetizing.} |
Not to be discouraged, I tried again today. I was positive that slow cooker applesauce was a brilliant idea and I just had to fine-tune the details. My second batch was based off of this recipe. I used Gala apples along with Granny Smith again (and possibly a Honeycrisp may have been thrown in; I can't remember for sure). I changed the recipe slightly by using only 1/8 cup sugar in place of 1/2 cup and I skipped the cinnamon altogether since Logan seemed averse to it. This batch cooked on high for 3 hours before I mashed it (very, very easily) with my potato masher. I wish I knew how he felt about the changes, but he went to bed early without even tasting it. It definitely isn't too sweet, and Mia asked for seconds and thirds, so I know she enjoyed it. The kitchen smelled nice (although it would have been just heavenly if I had added the cinnamon), and overall, this was a success. I will most definitely be making more slow cooker applesauce, but I think next time around, I will use apple cider in place of water like I have done in the past when I make my applesauce on the stove top. Yummy! I love fall in the Mitten State (even though my apples are coming from elsewhere this year).
 |
| {I filled my slow cooker about 3/4 of the way for batch #2.} |
 |
| {Looks good, doesn't it? This is definitely one of my favorite fall flavors!} |
Wednesday, October 3, 2012
My Head is Spinning with the Possibilities...
Last week, I found a RoseArt Hover 'N Spin Paint Machine at a garage sale for $2 (and it still had four working C batteries inside). I had no real expectations, but I decided it was worth a try for that little, especially considering the batteries were included and I didn't have to invest in those. I had actually been wanting to try spin art for awhile and had spent the whole summer checking yard sales for a salad spinner for that purpose. This was even better, though, because we don't have to make it spin ourselves. There was no paper included, but it was easy enough to look at the tray and determine that it takes 4 inch squares. I got some plain white printer paper and used my paper trimmer (definitely recommended for quick, uniform cutting while the kiddos are waiting) to cut it to size.
Both Mia and Logan loved making spin art over the weekend. In fact, Logan asked to do it again this morning, and he really isn't
all that into arts and crafts, so I knew I had found a true winner this
time. The outcome is always a bit unexpected. The inner tray is very, very lightweight plastic, so when the motor is turned on, it actually flies up and hovers for a bit while paint is applied to the paper. (This is the really unpredictable part. Sometimes it would stop almost immediately when the kids squirted in the paint, possibly from using too much, but other times in would keep spinning until they were satisfied and ready to turn it off.) Still, it is pretty cool, and it cleans up easily with a damp cloth. I am not sure whether or not the included paint stains so I just made sure they weren't wearing good clothes.
I laid their completed pieces on paper towels to dry and labeled them with black felt tip pen to keep them straight. Once they were dry, I used scrapbooking adhesive to mount the individual squares to 12" x 12" pieces of colored card stock and then mounted them in frames. I knew that they would have more visual impact grouped together, and I am pleased with the final results. Now we have some cool new wall art, and I just have to decide where to hang them...
 |
| {Spin Art by Mia, Age 5} |
 | |
| {Spin Art by Logan, Age 3} |
Even if I had paid full price, I think this would have been a good investment. I looked online, but they must not make this particular model any longer. I did, however, find a similar one (non-hovering) on Amazon. Today we tried using card stock instead of computer paper, which worked well. The only problem was that I chose a gray color and it made the paint seem muted instead of showing the true vibrant colors, so I would stick with white paper (or paper a pale piece of decorative scrapbooking paper if we decide to experiment...) I also wondered what paint to use when the included bottles run out. I experimented with food coloring, and it seemed okay, so I think any thin paint will work. Not too long ago, I got some powdered tempera paint on clearance at Michael's so I think that will be perfect since I can mix up small batches and get just the consistency that I want.
 |
| {If it gets this one being creative, how can I go wrong?} |
 |
| {Warning: this is addictive!} |
 |
| {Gray paper = kinda blah spin art} |
 |
| {My food coloring experiment reminds me of aliens.} |


A Boo-tiful Mind

For the past two years, we have "Boo'd" our neighbors and even though it didn't really spread like I had hoped, I have to keep trying. My husband came home from work yesterday, saw my stuff spread on the counter and said, "Oh, you're doing that again this year?" He laughed when I responded, "Yes, I have this delusion that people will participate if I do it enough!" Really, it has to catch on at some point, right? And if not, then in about 10 more years, I will have given small gifts to everyone in the neighborhood (which is nice, don't you think?)
This year I kept it very simple: brown lunch bags, items from the pantry (fruit snacks, candy left over from the pinata), and a couple items from Dollar Tree (cute candy corn socks, a yellow maple leaf votive holder, and an orange pumpkin scented tea light -- nothing creepy or possibly offensive as far as I could tell; Halloween should be fun for everyone in my opinion.) I put the items in the bag along with the BOO sign, and two more copies of the poem and BOO sign for them to pass along, and just stapled it shut. Then, I affixed the poem to the front of the bag, added a fun stamp and a little medallion that I made on orange card stock using another couple stamps from the same set plus a little bit of jack-o-lantern ribbon. The link for the poem and sign I used last year and the year before didn't seem to work so I searched and found this very cute version, which is in black and white, perfect for saving ink and making it easier for people to share in the fun. Once they were packaged up, I dropped them off in two mailboxes on my way to the dentist. Maybe I am nuts, but I think this is a fun, easy, and inexpensive way to celebrate Halloween and get people in the neighborhood to interact with each other (albeit secretively, but still...), and I am just going to keep doing it in the hopes that other people will join in.
See my previous attempts at spreading joy in our kind of boring, everybody-mind-your-own-business neighborhood:
Year #1
Year # 2
Subscribe to:
Posts (Atom)