Saturday, October 30, 2010

Bat Halloween Treat Cup


Bat treat cup by Mia, age 3 1/2
The directions for making this bat treat cup are very similar to those for making the black cat treat cup. Inspiration for this craft comes from this website.

Materials Needed:
  • tin can
  • black paint
  • paint brush
  • black construction paper
  • glue
  • scissors
  • clear tape 
  • wiggle eyes
  • small black paper plate (or regular plate colored black)
  • white construction paper
Directions:
  1. Paint the outside of a tin can black. We used a foam brush and dabbed it to get into the ridges of the can.
  2. While paint is drying, cut out 2 triangles from black construction paper for ears and fangs from white construction paper..
  3. Cut a small black paper plate in half.
  4. Holding a paper plate half so the curved part is on top, cut scallops on the bottom to resemble a bat's wing. Repeat with the other half of the plate.
  5. Glue wiggle eyes, ears, and fangs to the front of the can. (We used Aleene's Tacky Glue.)
  6. Using clear tape, adhere wings to the back of the can.
  7. Fill with goodies and enjoy. 

Black Cat Halloween Treat Cup

Treat cup decorated by Mia, age 3 1/2
This craft was adapted from one found on this website. The directions for making this treat cup are very similar to the directions for making a bat Halloween treat cup.

Materials Needed:
  • tin can
  • black paint
  • paint brush
  • black and pink construction paper
  • 2 white pipe cleaners (or yarn)
  • pink pipe cleaner (or yarn)
  • glue
  • scissors
  • clear tape (optional)
  • wiggle eyes
  • black pipe cleaner (optional)
Directions:
  1. Paint the outside of a tin can black. We used a foam brush and dabbed it to get into the ridges of the can.
  2. While paint is drying, cut out 2 triangles from black construction paper for ears. Then cut 2 slightly smaller triangles from pink construction paper. Glue pink triangles onto black triangles.
  3. Cut another pink triangle for the nose.
  4. Cut a pink pipe cleaner in half and then bend one half to make the cat's mouth.
  5. Cut 2 white pipe cleaners in half and then bend each new length of pipe cleaner in half to make whiskers.
  6. Glue wiggle eyes, ears, nose, mouth, and whiskers to the can. (We used Aleene's Tacky Glue and then added some clear tape to secure the pipe cleaners.)
  7. You may wish to add a black pipe cleaner to the back of the can and curl it to look like a tail.
  8. Fill with goodies and enjoy.

Friday, October 29, 2010

Jack-o'-Lantern Pizza

Last night's dinner was a family project.


I saw a picture of something similar made by my friend Katie last year, so I decided we would try making our own jack-o'-lantern pizza for dinner. It turned out pretty cute and tasty.
Materials Needed:
  • pizza crust mix (We used Betty Crocker)
  • pizza sauce
  • shredded mozzarella cheese
  • pepperoni
  • pizza pan
  • kitchen scissors
  • flour
  • rolling pin (optional)
Directions:
  1. Prepare pizza dough according to package directions.
  2. Flour counter top and hands before working with dough. You may also want to add some flour to the dough so it is easier to work with. (We like to use a floured rolling pin to form the dough into the shape we want, picking dough up often so it doesn't stick to the counter.)
  3. Add dough to pizza pan and reshape as desired.
  4. Top with pizza sauce.
  5. Add shredded cheese. (We use mozzarella, but there are pizza cheese blends you can also try.)
  6. Cut pepperoni to look like eyes, nose, and mouth. (We were running short on time and only cut a triangle nose. The rest of the pepperoni we used in its original round shape.)
  7. Decorate pizza with pepperoni to form the jack-o'-lantern's face.
  8. Bake according to package directions. Enjoy!
Note: If you want to save time, you could use a frozen cheese pizza and add pepperoni.

Thursday, October 28, 2010

The Christmas Card Conundrum

It's the most wonderful time of the year! With Halloween nearly over, I am starting to think about what sort of holiday cards* I will be sending out this year. Shutterfly has many, many holiday card designs to choose from. Plus, “Shutterfly is offering 20% off all holiday cards.” The hardest part is deciding which design to use...

 
One option is to create holiday story cards. My favorite one is very cheery and it allows me to list some favorite moments from the year:
Love 2010


Sweet Scalloped Frame 


This would be perfect for keeping it simple! And using a black and white photo gives it timeless appeal.

I like how this one is modern and bright.
Bright Blooming Christmas Tree 


This one reminds me of scrapbooking paper, so naturally I am drawn to it.
Sweet and Merry Christmas

This is cute and it allows me to use four pictures since it is sometimes hard to narrow down my photo picks. I would use black and white or sepia photos to give them a cohesiveness.
Very Merry Tree Christmas 


This one has a simple elegance to it. It would look especially classic with sepia toned photos.
Snow Flurries Cocoa Holiday Card


I am not sure how I will ever narrow it down to just one card design, but it will be fun adding our photos and personalization to the one that makes the final cut.
 
*Please note that I have been offered 50 free holiday cards for blogging about Shutterfly's 2010 holiday card collection!

Cheese and Cracker Spider-wich Snack

I adapted this snack idea from spider cookies I found on this website. I wanted to make it a bit healthier, so I used crackers instead of vanilla wafers, spray cheese in place of frosting, raisins instead of candy, and pretzel sticks rather than licorice rope.

Materials Needed:
  • round crackers (such as Ritz)
  • spray cheese (You might also use cream cheese or peanut butter.)
  • pretzel sticks
  • raisins
Directions:
  1. Spread spray cheese on inside of one round cracker.
  2. Insert 8 pretzel sticks to make spider's legs.
  3. Top with another cracker. You may wish to add a small amount of spray cheese to help it stick.
  4. Using two small dots of spray cheese as "glue," apply raisins for eyes.
  5. Enjoy!

Wednesday, October 27, 2010

The Greener Cleaner Experiment

I have been considering trying out some homemade green cleaning solutions for awhile now. One reason I have considered this is to save money. The main reason, however, is that being home full-time with the kids means that we are home a lot more than we used to be, and therefore, exposed much more to whatever environmental pollutants are in our house.

My husband's aunt sent an email awhile back about how hydrogen peroxide had so many uses. I am skeptical about some of its purported health benefits, but I did believe that it is effective as a cleaning product. Then, a friend from my mom's group emailed a recipe for a green cleaner that she uses, and I decided it was time to start trying to make my own household cleaners. I already knew that baking soda, Dawn detergent, and lemon juice were handy for cleaning since I use those when I strip diapers, but I needed to investigate some other common household items that are said to be excellent cleaners. Here is what I have learned so far...

First Attempt: 2 cups vinegar left in toilet over night and then scrubbed in the morning.

Pros:
  • The toilet is clean and sanitized and some of the rust ring is diminished (we have iron in our well water). 
  • Vinegar is an inexpensive cleaning product that most everyone has at home. 
  • This is very simple!
Cons:  
  • The smell of vinegar is one that I can't stand. I am going to continue looking for a greener way to clean the toilet bowl, however, it must NOT make me want to throw up!

Second Attempt: Equal parts hydrogen peroxide and water mixed in a spray bottle. I used this to clean the kitchen sink, counter, and stove top, the toilet bowl, lid, and seat, dining table and chairs, bathroom mirror, and windows.

Pros:  
  • Everything is clean and sanitized without a chemical (or vinegar!) smell. 
  • This cost-effective cleaning solution is quick and easy to make. 
  • It seems to clean glass well without leaving streaks behind.
Cons:
  • I still need something to cut the grease residue on my stove. 
  • Cleaning smudges from mirrors and windows takes a bit more elbow grease than with a commercial window cleaner. 
  • There is some cleaning solution residue left on the table on chairs, possibly because the wood is finished.
Third Attempt: This recipe for an all-purpose cleaner is from my friend Darla. 

Safe and Green Household Cleaner
In a spray bottle mix:

3 tablespoons vinegar
1 teaspoon Borax (found in the laundry detergent aisle- I bought a 4+ lb. box for under $5)
2 cups water
1 tablespoon dish soap (I used Dawn)
1 drop scented oil (optional) 

*Shake
 
Pros: 
  • Everything is clean and sanitized, and the vinegar smell is so minor, I am easily able to use this solution for cleaning just about anything. It really lives up to the name "all purpose cleaner."
  • This appears to work better on grease than the hydrogen peroxide and water alone, I am guessing because of the Dawn.
  • This works well on windows and does not leave streaks.
  • I think this worked better on my linoleum floors than a commercial cleaner, and it smells much better, too. 
  • This is much cheaper than commercial cleaning products, and it is simple to make.
Cons:
  • My table looks about the same as with the 50/50 hydrogen peroxide/water mixture: some residue left behind. (This bothers my husband much more than it bothers me.)
  • For window cleaning, you may want to spray a bit on your cloth instead of directly on the window because it is a bit sudsier than commercial window cleaners (again, I think because of the Dawn.)
Fourth Attempt: I made a paste of baking soda and Dawn dish detergent and used it as a soft scrubbing cleaner. I tried this on my bathroom sinks and counters, the stove top, kitchen sinks and counters, the shower door, and the microwave.

Pros: 
  • Everything is clean and sanitized without being scratched.
  • This also appears to work better on grease than the hydrogen peroxide and water alone, I am guessing because of the Dawn.
  • This really got rid of the soap scum and even mineral deposits from our hard water (both on the shower door and in sinks).
  • This is much cheaper than commercial cleaning products, and it is simple to make with products that most everyone already has in their homes. 
  • I even tried this mixture watered down so I could put it in a squeeze bottle. It worked just as well as the more concentrated paste. A little bit goes a long way!
  • No chemical odors means that this is a safe cleaner to use (and I wasn't worried about cleaning without wearing gloves.)
  • The inside of my microwave is cleaner than it has been in quite some time. (Okay, I will admit to having not cleaned it in quite some time, but still...)
Cons:
  • This is so effective, that it's almost too sudsy. My only complaint was how often I had to re-wet my sponge.
The Verdict on Homemade Cleaning Solutions: 

Basically, I am thinking, "Why didn't I do this sooner?!" The amount of money saved by making cleaners instead of buying them makes it worth it. And that's before considering environmental impact, both for my household and overall. I feel so much better knowing that I am not filling our home and our bodies full of unnecessary chemicals.

    Pumpkin Seed Pictures

    Materials Needed:
    • dry pumpkin seeds
    • paint (various colors, depending on your design) 
    • paintbrushes (not needed if you use a zippered baggie)
    • paper plate or bowl (or zippered baggie) 
    • wax paper
    • paper
    • glue
    • Witch drawn by Mama and filled in by Mia, age 3 1/2
    • pencil
    Directions:
    1. Paint pumpkin seeds. You can do this on a paper plate or in a shallow bowl. (You could also put the seeds in a zippered baggie along with paint and shake it up. I felt that this was the most efficient and least messy of the ways that we tried.) Lay seeds on wax paper to dry. (We used a separate piece of wax paper for each color, which worked well.)
    2. While pumpkin seeds are drying, draw your design on paper.
    3. Glue seeds onto paper to fill in the design (in the style of a mosaic).
    I made my jack-o'-lantern on black paper and skipped filling in the eyes, nose, and mouth.
    Note: We tried coloring the seeds with markers instead of paint for a less messy option, but regular markers did not work well on the seeds. Permanent markers may work better, but we didn't try this.
    This craft was inspired by this site.

      Monday, October 25, 2010

      Mummy Jack-o'-Lantern

      I found this idea in a book called Halloween Pumpkins & Parties: 101 Spooktacular Ideas, published by "Better Homes and Gardens."


      Materials:
      • smooth white pumpkin
      • carving tools (or knife and spoon/ice cream scoop)
      • 2 black marbles
      • 2 flat toothpicks
      • pen (I used a pencil)
      • adhesive that will work on glass
      • candle
      • newspaper (optional)
      Directions:
      1. Set pumpkin on newspaper and cut off top of pumpkin.
      2. Scoop out seeds. If desired, save for roasting or another project.
      3. Cut two eyes, making sure they are large enough to hold the marbles. Cut a nose and a mouth. Working your way around the pumpkin, carve additional curvy pieces to look like mummy wrappings. (If you are concerned about getting your design right, draw it with a pencil or pen before starting to carve the pumpkin.)
      4. Insert a toothpick into each eye hole. (Mine were too long, so I shortened them by breaking them.)
      5. Using a strong adhesive (I used Super Glue), glue a black marble to each toothpick, making the eyeballs. (I didn't have black marbles so I used clear glass pebbles, which I colored the back side of using a permanent black marker. I think these might have been better, anyway, since they have a flat side, which made them easy to glue to the toothpick. You can get these at any craft store.)
      6. Add a candle (or flameless "candle"), replace the top of the pumpkin, and you are set to spook some trick-or-treaters! (Use caution if using a candle.) 

      Sunday, October 24, 2010

      Hand Print and Foot Print Ghosts

      Hand Print and Foot Print Ghosts by Mia, Age 3 1/2
      Here is a very quick, very simple project for your little ghouls and goblins to make.
      Materials Needed:
      • white paper
      • pencil
      • black paint, crayon, colored pencil, or marker
      • scissors
      Directions:
      1. Trace child's hand (or foot) onto white paper.
      2. Cut out hand print (or foot print). 
      3. Draw or paint eyes and mouth. (We used black dimensional paint.)
      Note: Another option for this craft is to paint child's hand with white paint, press onto black construction paper, allow paint to dry, and then draw/paint on face.

      Thursday, October 21, 2010

      Dum Dum Sucker Spiders

      This craft is easy and inexpensive to mass produce. We did 20+ assembly line style for Story Time treats, each one taking only a minute or two in total. They would be cute to hand out to trick-or-treaters or as party favors. I modified this idea from http://familyfun.go.com/crafts/spider-pops-661131/ which calls for Tootsie Pops. I used the Dum Dums because I already had them. Since they are smaller than Tootsie Pops, I decided to cut the pipe cleaners in half instead of using four whole pipe cleaners (which also saved money on materials.) I bought two packages of 25 black pipe cleaners at Walmart for 77 cents each.
       
      Materials Needed:
      • Dum Dum sucker
      • 2 black pipe cleaners
      • glue
      • wiggly eyes
      Directions:
      1. Cut two pipe cleaners in half.
      2. Holding all four pieces of pipe cleaner together, twist up around base of Dum Dum sucker. You now have four legs on either side of the sucker, which becomes the body of the spider.
      3. Bend and arrange pipe cleaners as desired to form the legs.
      4. Glue wiggly eyes onto center of pipe cleaners to form the head of the spider.

      National Child Identification Program

      Every time I see those missing child photos that come in the mail, I think about what I would do if it was my child who was lost. I wonder if I would be able to provide an accurate description of my child while going through a parent's worst nightmare. That's why I completed ID kits for both kids. These kits included basic information sheets, fingerprints, DNA samples, and photos, which would all help in the event that either child is lost or abducted (scary, right?). This was a time-consuming process, but I feel it is absolutely worth it for my own peace of mind and the safety of my children. The ID kits are kept at home, but they also come with wallet cards, so I will always have identifying information with me.

      Filling out the information section was simple enough. I provided the kids' full names, social security numbers, gender, race, birth date, eye color, hair color, height, weight, and the contact information for their pediatrician and dentist (for medical and dental records). The only thing I don't know is their blood type, so I left that part blank.

      Next, I swabbed the insides of their cheeks to collect the DNA sample. The kit came with good directions for how to do this. The hardest part was waiting two hours for the swabs to dry. That wasn't hard, but I did make sure to label them with sticky notes so I wouldn't mix them up and put one back in the wrong ID kit.

      The trickiest part of the whole process was collecting their fingerprints. Fortunately, the fingerprints are "inkless." (The ink only shows up on the paper, kind of like Crayola Color Wonder markers or paint, if you're familiar with those.) Clear directions are provided along with examples of "good" and "poor" fingerprints. It takes a bit of practice to get prints that aren't smudged, and it is challenging to fingerprint a squirming toddler! (I strapped Logan into his high chair for this.) Lastly, I added some current pictures. (I will have to remember to update them yearly, which is recommended.)

      I am strongly encouraging everyone to take the time to complete a child ID kit for each of their children. The National Child Identification Program website includes these prevention tips for keeping children safe. I know most of this is commonsense, but their statistic states that
      "Over 800,000 children are missing every year-- That's one every 40 seconds."
      While it's disturbing to think about that, it would be far worse knowing that I didn't do all I could to prevent it from happening to my family.

      Wednesday, October 20, 2010

      Finger Puppet Bats

      This project would be perfect for an elementary class, scouting group, or any Halloween gathering with kids. It would be easy to cut out several bats in advance and let the kids decorate them. I found this project idea here: http://familyfun.go.com/crafts/batty-finger-puppets-664771/

      Materials Needed:
      • bat template 
      • black construction paper
      • pencil
      • white crayon
      • scissors
      • glue
      • pom pom
      • wiggly eyes
      • circular punch (optional)
      Directions:
      1. Print off bat template.
      2. Cut out bat template.
      3. Trace bat onto black construction paper using template.
      4. Cut out construction paper bat.
      5. Use scissors or circular punch to make finger holes.
      6. Glue pom pom below bat ears and above finger holes to make the bat's head.
      7. Glue on wiggly eyes. Allow to dry.
      8. To make the wings stand out, you can accordion fold them and then highlight the folds with a white crayon.
      Notes:
      • If you don't want to make finger puppets, you can skip the holes and use fishing line to hang several bats for decoration. 
      • You could also glue two bats together, leaving an opening at the bottom wide enough to use as a finger puppet or attach a craft stick for a handle.
      • The original craft directions said to use black pom poms. We didn't have black, so we used various colors, which I think look fine.

      Tuesday, October 19, 2010

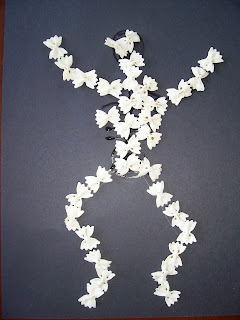
      S'ghetti Skeletons

      Craft idea from: /http://www.enchantedlearning.com/crafts/halloween/pastaskeleton/


      I used scissors to cut spaghetti and fettuccine for the fingers, toes, and spine.
      Materials Needed:
      • black construction paper
      • glue (We used Aleene's Tacky Glue.)
      • different types of pasta  (spaghetti, fettuccine, spiral, tube, shell, macaroni, bow tie, wagon wheel, etc.)
      • dried beans (optional)
      • pencil or white crayon
      • scissors (optional)
      Directions:
      Skeleton by Mia, Age 3 1/2
      1. Draw skeleton onto black construction paper using a pencil or white crayon.
      2. Lay out pasta or dried beans and arrange to form the skeleton. (Note: If you want your pasta to be white, put it in a zippered baggie with white paint, shake until pasta is covered with paint, remove coated pasta from bag, and allow to dry on wax paper.) You could use a wagon wheel for the head, dried beans for the pelvis, macaroni for the ribs, small shells for the knee caps/wrists/elbows, tube or spiral pasta for the arms and legs, spaghetti for the fingers and toes, or any other combination you come up with.
      3. When you are happy with the arrangement, glue pasta to the paper and allow to dry.
        Mia chose to use only bow tie pasta for this skeleton.


      Monday, October 18, 2010

      A Boy and His Dog (are Not So Different)

      Some people will tell you that having a dog does not prepare you for having a baby. While kids and dogs are obviously not the same, I tend to disagree. Having a son is very much like having a dog. Here are some things that I've caught Logan doing that mimic our dog, Ritzy's, actions:
      • eating dog food (Of course, we don't give this to him!)
      • dipping his hand/cup/pacifier in the dog's water dish (and then sucking on it)
      • lying in the dog's kennel (He gets in there on his own, and then he refuses to get out. Sometimes he even shuts the door!)
      • tracking in dirt
      • making a lot of unnecessary noise
      • demanding attention
      • enjoying time outside
      • carrying things around in his mouth
      • nipping playfully
      • spilling his food
      • dribbling his water
      • snuggling
      • chewing on things (shoes, clothes, toys, the dog's rawhide...)
      • eating grass


      The main difference between having a son and having a dog is that you can leave the dog home alone!

        Sunday, October 17, 2010

        Ghostly Greeters Craft

        Here is a super simple craft (not recommended for younger children, however) that you can do with very few supplies. Soon you'll have a row of ghosts to greet your trick-or-treaters! I got this idea from: http://familyfun.go.com/crafts/spirit-jugs-673388/
        Materials Needed:
        • plastic milk jugs
        • black permanent marker
        • scissors (or craft knife)
        • string of low wattage holiday lights
        Directions:
        1. Using a black permanent marker, draw faces on plastic milk jugs. Keeping the cap on makes it easier to do this without denting the jug. (All of our jugs have inset circles on the front, so I tried to work with these to make the mouths.)
        2. Cut a hole in the back side of the jug (about 1 1/2 -2 inches in diameter). I used scissors to do this, but you could also use a craft knife. Again, keeping the cap on the jug makes it easier to do this.
        3. Set finished jugs near each other and string them together by pushing several bulbs into each milk jug. (I used purple and clear Christmas lights, but you could use any color. I have even seen strings of lights with Halloween shapes such as candy corn, which may be cute.

        Saturday, October 16, 2010

        Say It Three Times

        I've noticed that I repeat things a lot lately. Apparently, I think that if I say something three times in rapid succession it will have more impact. It doesn't seem to make a difference, but I do it nonetheless.These are a few of the words I have caught myself saying again and again.
        • No! No! No!
        • Stop! Stop! stop!
        • Careful! Careful! Careful!
        • Wait! Wait! Wait!
        • Logan! Logan! Logan!
        • Mia! Mia! Mia!
        • Buddy! Buddy! Buddy!
        As you have likely guessed, most of them are said when I'm upset. So, a new goal for myself is to start praising, praising, praising!

          Friday, October 15, 2010

          Spooky Spider in a Web Craft


          Materials Needed for Spider Web:
          • black paper plate (or plain plate colored with black crayon, marker, or paint)
          • hole punch
          • black yarn (or thread or string)
          • scissors
          Directions for Spider Web:
          1. If using a plain paper plate, turn over and paint or color black. Allow to dry, if needed.
          2. Use hole punch to make holes around the outside of the plate.
          3. Cut a length of yarn, thread through a hole, and knot on the back (Use as many knots as needed to secure the yarn so that it won't come through the hole.)
          4. Lace yarn through holes to form spider web. You will go over the plate and under the plate alternately.
          5. When you are close to the end of the yarn, tie it to a piece of the web. Start over with a new length of yarn, if desired. (You can cut more yarn and go through holes repeatedly until you get the web the way you want it. Just be sure to knot the ends of the yarn when stopping and starting each length.)
          Materials Needed for Pom Pom Spider:

          • scissors
          • glue
          • 2 pipe cleaners (We used black.)
          • large pom pom (We used neon colors.)
          • wiggle eyes
          Directions for Pom Pom Spider:
          Mia's Spider in a Web
          1. Cut two pipe cleaners if half.
          2. Lay the four pieces of pipe cleaner side by side.
          3. Twist pipe cleaners in the middle so that they are all connected. (You now have four legs on each side.)
          4. Glue pom pom to center of pipe cleaners.
          5. Glue wiggle eyes to pom pom.
          6. Allow glue to dry completely.
          7. Bend pipe cleaners to form the legs.
          This idea comes from: http://www.activityvillage.co.uk/paper-plate-spider-web.htm

            Thursday, October 14, 2010

            From the Mouths of Babes...

            December 21, 2009
            Mia narrating her letter to Santa: "Dear Santa, I want to give him a banana for him to eat. Let's give Logan a cupcake. Let's give Mia candy. I will give Ritzy dog food. I want him to bring me a 'squito (mosquito)." 

            February 1, 2010
            "Remember, Baby we don't kick dogs. Understand? Okay!"
            Mia was talking to her doll after the doll finished her time-out (apparently for kicking Ritzy). She even had the doll sit on the Time Out Pad.

            March 3, 2010
            "Mama, I'm a cowboy and Logan is a princess. Yee-haw!"
            She was wearing her green "cowboy" hat (leprechaun bowler hat) and had put a tiara on Logan.
              

            March 31, 2010
            "Your hair looks like a spider web."
            I'm not sure if this is a good thing or not, but she didn't say it a mean way, so I just said, "Oh."


            April 27, 2010
            "I'm wearing all these underwears!"
            Mia had put on 9 pairs of underwear and wanted help getting them off.

             
            May 2, 2010
            "Yay! Sunday School!!"
            It was the end of the children's message during church and the pastor had just dismissed the kids to Sunday School. Mia yelled this and took off running down the aisle.


            August 18, 2010
            "Sandwiches grow on seaweed. Then the birds come and eat the seaweed and we say, 'what happened to our sandwiches?'"
            We were discussing how things grow. She would ask where cherries grow, and I told her on a tree. She asked where grapes grow and I told her on a vine, etc.


            October 5, 2010 (Playing Hi Ho! Cherry-O with Mia.)
            Mia: "Mama, I'm going to win first and then it's your turn."
            Me: "You're going to win first?"
            Mia: "Yes. You have to wait your turn."
            (She then proceeded to beat me twice.)

            October 6, 2010
             Mia hiding in the blinds: "Mama, I'm going to be a curtain for Halloween!"

            October 8, 2010 
            Mia holding caterpillar: "Mama, he's sooo cute! Oh, he's so juicy, too!" 
            All I could say in response was, "Ummmm. What?"


            October 11, 2010  
            "Logan is handsome and I'm the honey." ~ Mia

            October 13, 2010
            Mia with messy hair after taking a bath:
            "He he he. Look at that! It looks almost like your hair!"

            Wednesday, October 13, 2010

            Hand Print Bat Craft

            The inspiration for this project comes from the Oriental Trading Co. catalog.

            Materials Needed:
            Hand Print Bat by Mia, Age 3 1/2
            • black construction paper
            • scissors
            • glue
            • wiggle eyes
            • white craft foam (or construction paper)
            • dimensional paint (optional)
            • pencil
            Directions:
            1. Trace both hands onto black construction paper.
            2. Cut out paper hand prints.
            3. Cut the face/body of the bat from black construction paper. (Ours looks like an oval with pointy "cat" ears on top.)
            4. Glue hand print cutouts to bat's body to form wings.
            5. Glue wiggle eyes to bat's face.
            6. Cut fangs from white craft foam.
            7. Glue fangs to bat's face. (You could also use candy corn for a fun twist!) 
            8. Draw a mouth. (We used red dimensional paint. You could use crayon, marker, or tempera paint in any color.)  

            Tuesday, October 12, 2010

            Paper Bag Pumpkins

            Paper Bag Pumpkins by Mia, Age 3 1/2
            Here is a cute and simple craft for kids of all ages. You can easily make a whole patch of pumpkins (or jack-o-lanterns) to decorate your home for Halloween! I expanded this craft idea from the following: http://www.crayola.com/crafts/detail/paper-bag-pumpkin-patch-craft/

            Materials Needed:
            • paper bag
            • orange crayon
            • black construction paper
            • green construction paper
            • green curling ribbon
            • newspaper
            • glue or tape
            • scissors
            Directions:
            1. Using an orange crayon, color the paper bag, leaving about 2 inches at the top plain brown. (Removing the paper from the crayon and using the side of the crayon makes coloring large areas go faster.)
            2. Crumple newspaper and use it to fill the orange part of the bag.
            3. Twist the brown section of the bag to form the stem. 
            4. Cut leaves from green construction paper and glue (or tape) them to the stem.
            5. Cut a length of green curling ribbon, tie to stem, and use blade of scissors to curl the ribbon. (If you don't have curling ribbon, you could cut strips of green paper and use scissors to curl it OR use pipe cleaners.)

            Monday, October 11, 2010

            Paper Plate Pumpkin Mask

            Materials Needed:
            • paper plate
            • orange crayon
            • scissors
            • black marker
            • craft stick
            • clear tape
            • brown construction paper
            • green construction paper
            • green pipe cleaner

            Directions:
            1. Using an orange crayon, color the back of a paper plate. (You could also use paint or marker.)
            2. Using a black marker, draw a face on the pumpkin, making sure that the eyes are toward the center or even a bit lower. (If the eyes are too high it makes it awkward for a child to hold the handle and look through the mask.)
            3. Cut out eyes only. (We tried cutting out the nose and mouth, but it looks weird against your face.)
            4. Tape craft stick to opposite side of plate to make the handle.
            5. Cut* out a stem from brown construction paper and a leaf from green construction paper and glue onto the plate. 
            6. Curl* a green pipe cleaner around your finger (or a pencil) to make a vine. Tape to plate. (*optional)

              Thursday, October 7, 2010

              Random Musings of a Tired Mama

              I sometimes hear parents say that their kids are paying them back for how they behaved for their own parents. So what gives? My parents say that I was an easy child to raise. How did I end up with a diva-in-training and a walking disaster who's always on the move?

              Sometimes I wonder if there is significance in my kids' first words. Mia's first actual word (I don't count mama) was "bye-bye." Since then, we have had many incidents involving her running away from us in public places. Logan's first word wasn't really a word, more of a laugh. "Ha ha ha." Clearly, the joke is on me. Now if I only knew what it was, I could prepare myself!

              You know how people joke that if you want it to rain, you should wash your car? Getting Logan to poop is essentially the same. He usually does when his cloth diapers are in the middle of a wash cycle. He doesn't even go on a daily basis, yet this he manages to do with regularity.

              How did we end up with so many stuffed animals in our house? My theory is that they breed during the night. Also, why do half of them play music or make noise of some kind? As if it's not enough that they are everywhere, they have to drive me even crazier by playing "Jingle Bells" year round or growling when stepped on.

              Why hasn't anyone ever invented a sock that will stay on a baby's foot? I think if this could be achieved it would be worthy of a Nobel Prize.

              Just for one day, I would like to use the bathroom without an audience, and go from sunup to sundown without wearing someone else's food crumbs or bodily fluids. (And a full night's sleep wouldn't be too shabby either.)

              Wednesday, October 6, 2010

              Jolly Jack-o-Lantern Craft

              By Mia, Age 3 1/2 (felt cutting by Mama)


              Materials Needed:
              • paper plate
              • orange paint
              • glue
              • scissors
              • black felt
              • white crayon
              • paint brush
              • tape
              • brown or green pipe cleaner
              Directions:
              1.  Paint paper plate orange.
              2. While paint is drying, use white crayon to draw eyes, nose, and mouth on black felt. I had Mia tell me what shapes she wanted, how many teeth in the mouth (and what shape) since she struggles with making shapes and cutting them the way she wants. (You could also use black construction paper or craft foam.)
              3. Cut out felt shapes.
              4. Glue felt to paper plate, crayon side facing down.
              5. Twist pipe cleaner around your finger so that it looks like a spring, leaving about an inch straight. 
              6. Tape straight part of pipe cleaner to the back of the paper plate.

              Tuesday, October 5, 2010

              Gone Batty Craft Project

              Since my kids have been making me just a tad batty lately, I've decided it's time for another craft project! Follow these simple steps, and you will soon have your own spooktacular colony of bats. My inspiration for this project comes from: http://www.craftbits.com/project/egg-carton-bat

              Materials Needed:
              • egg cartons
              • black paint
              • paint brush 
              • scissors
              • glue
              • wiggly eyes
              • elastic

              Optional Materials:
              • white felt or craft foam
              • dimensional paint
              • wooden skewer

              Directions:
              1. Cut egg carton into 3 sections. (We used both cardboard and Styrofoam egg cartons. The cardboard seemed to take paint better, but the Styrofoam is slightly easier to cut. I think the cardboard is also more durable.)
              2. Use a skewer (If you don't have a skewer, use a pencil or tip of scissors) to make a hole in the top for hanging. 
              3. Cut wings from two outside sections. (It looks like you are cutting arches on either side.)
              4. Paint black and allow to dry. (We used tempera paint.)
              5. Decorate by gluing on wiggly eyes. We used glued on some fangs cut from white felt and white craft foam (I preferred the foam). Then we added dimensional paint to make the rest of the mouth. (If you use the dimensional paint, it takes much longer to dry.)
              6. Add elastic for hanging, so the bats will be bouncy. Insert both ends into the hole so there is a loop on top, and then knot the underside. (My elastic was saved from some packaging, possibly a box of chocolates.) If you don't have elastic, you can use string, yarn, or ribbon.